

Heat
There’s only high heat, low heat, or no heat. Go big or go home.
I tried feathering this week’s technique and science takeaways into the process of a recipe, rather than talking concepts first and application second. Let me know if you find this format easier or harder to follow, as I’m still exploring what the best way is to convey this information.
For something so basic, so fundamental to the process of cooking, the application of heat is wildly misunderstood. As a result, most food cooked at home is mostly commonly either overdone, underdone, or at best uneven, but rarely cooked to perfection.
There’s plenty of blame to go around on this. Recipes in books and online are a big part of the problem. They commonly offer cooking directions using overly simplistic terms — “cook this or that at this temperature for this period of time.”
But ask a professional chef how long to cook something and you’ll get a deceivingly simple answer — “until it’s done.”
Few home cooks have developed the understanding or confidence to tell when “it’s done.” And we’re partly to blame as well. When blindly following a recipe, we’re just doing what it says (ie: roasting chicken in a 375-degree oven for 1.5 hours) without thinking about what’s actually happening to the food along the way.
Instead of educating ourselves, we’ve demanded simple algorithms in lieu of actually understanding what the application of heat is doing to whatever it is we’re cooking.
Complicating our understanding of heat is the fact that heat can be applied in many ways. There’s wet heat (boiling, simmering, blanching, poaching, steaming, braising, and stewing) and dry heat (roasting, baking, grilling, broiling, griddling, frying, sautéing, smoking). Each cooking method has a different effect on whatever food you’re preparing.
But a common concept that applies to all methods is an understanding of how much heat to apply, for how long, and to what end. In short… cause and effect.
Across all cooking methods, there are only three types of heat you need to focus on — high heat, low heat, and no heat.
High heat typically causes a fast reaction of some sort (browning meat or blanching vegetables). 400 degrees or higher
Low heat more slowly “cooks” the food from raw to edible. 325 degrees or lower.
No heat is the process of letting the food rest as needed.
Forget medium. Medium means you’re either not using high enough heat when high heat is required, or too high a heat when low heat is required. Medium is the kind of middle-of-the-road, safe-but-ineffective bullshit that’s been fed to home cooks for years. Be bold! Go big or go home!
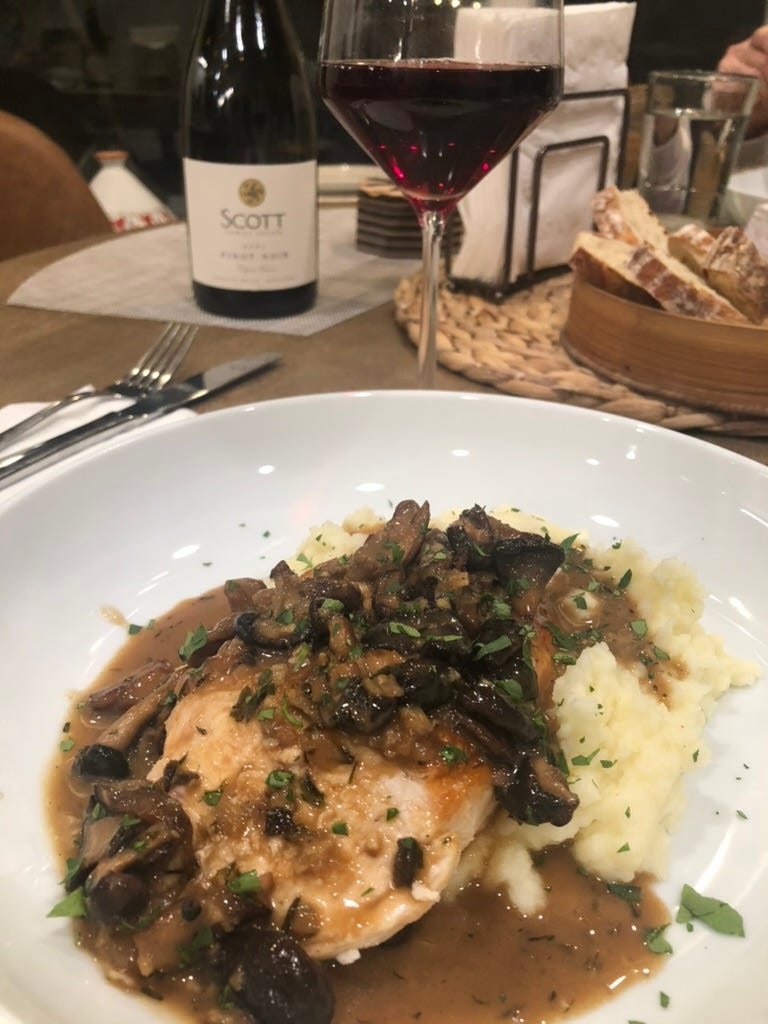
To best explore these concepts fully, let’s focus on a simple weeknight dish that uses a combination of several cooking methods and heat levels — pan roasted chicken marsala with mashed potatoes.
Chicken
For this version, I use skin-on chicken breasts, with or without the wing joint attached (aka: frenched or airline chicken breast). You can buy these pieces already packaged in the store, or break down a whole chicken yourself.
Let the breasts sit out until they reach room temperature (about 2 hours).
Why: Cold chicken from the fridge reacts more slowly to the application of heat.
Pat breasts dry and salt.
Why: Salt will draw water out of the chicken skin, which will result in crispier skin
Put a carbon or stainless steel skillet big enough to hold all your chicken breasts without crowding them over a high heat. Preheat your oven to 325. Take out a sheet pan large enough to hold all your chicken, with a rack inserted.
When the air around the pan is sort of shimmering like a hot sidewalk, it’s hot. Add just enough neutral oil (I use sunflower oil) to coat the bottom of the pan without pooling.
Why: Heat opens the pores of the metal, which the oil then fills, creating a more non-stick surface.
Pat dry the chicken breasts one more time to remove any moisture pulled out by the salt.
Place chicken breasts skin side down to the hot pat and press down hard on each for about a minute.
Why: Pressing the skin hard against the hot pan will push out any air bubbles created by the hot oil bubbling up against the flesh. If you use your hands, you’ll actually feel this happening. This will create a more even sear.
Leave it alone and let the chicken sear skin side down until you see the edges of the skin start to brown. Only then is it OK to take a peek. You want a very dark brown sear, but not black.
Why: Searing creates a flavorful crust. And while it doesn’t exactly “seal in the juices” it does fill the meat’s pores with fat which minimizes the release of moisture. But only if it’s seared at a really high heat in order for this browning crust to develop fast and violently.
Once the skin is browned, flip and sear the non-skin side. No need to press down this time.
Why: There’s already enough fat in the pan, and the pan is now at a slightly lower temperature from the meat, so you won’t get the same bubbling reaction. Press again w/ your hands if you want, and notice how the bubbling effect of the skin side is no longer present.
Once browned, remove the chicken to the sheet pan with rack and place into the preheated oven at 325. Let roast until internal temperature is 165.
Why: While the high heat of the pan seared the outside skin of the chicken, the inside is still pretty much raw. Roasting at a low heat will allow the interior to cook more gently and evenly, without overcooking the seared outside flesh (which will just gently crisp up nicely instead). Also, lower heat provides more flexibility in cooking time (see note below).
A note on time: Since chicken breasts come in different sizes, and how long you seared them will differ, it’s impossible to give a set time for the slow roasting. As a rough guide, let breasts sit in the oven for 10-15 minutes before checking the temp w/ an instant read thermometer. Better yet, get a probe thermometer that allows you to monitor the temp remotely until it reaches your target.
Once the temp is reached, removed the entire rack/pan the chicken is in and let it rest. It’s OK to let it rest on the same rack it was cooked in. How long? Half the time that it was cooked for.
Why: Meat is a protein, and proteins seize up when heated. It’s this seizing that presses out juices and fat. Cutting it straight from the oven when the protein is still tight will push out all its moisture. What’s more the meat will chew tough. Resting allows the temp to come down, and the proteins to relax, resulting in a moister and more tender meat.
Sauce
Using the same pan you seared the chicken in (no need to clean), add a bit more neutral oil to coat the pan. Once about to smoke, add chopped mushrooms. Don’t add salt. Let them sear until they expel all their water and begin to brown slightly.
Why: mushrooms are full of moisture. They’re basically sponges. Unlike the meat, you want the heat to push all this moisture out first before you add any additional flavors, liquid, etc. Nobody likes soggy mushrooms.
Once the mushrooms begin to brown, add small diced shallots, pasted garlic, and thyme leaves. Add a little more oil if necessary (for both fat/flavor and to cool off the pan a bit if needed). Once shallots are translucent, add a little flour and stir until pan is dry and vegetables are coated.
Why: Adding shallots/garlic after the mushrooms avoid burning them in the hot pan needed to expel the mushroom’s moisture. Adding flour keeps the vegetables from burning and will help thicken the sauce in the next step.
Add 1 cup marsala wine (madeira works too) and 1 cup chicken stock. Turn heat down to a rapid simmer and reduce by half. You want a silky, unctuous consistency here, not a thin/watery sauce.
Simmering rather than boiling retains the flavor of the vegetables. Boiling will just evaporate everything.
Mashed Potatoes
Cover potatoes (whole or chopped into 2+ inch chunks as you prefer or as needed based on the size of the potatoes) with no more than an inch of water and heat until a low simmer (190 - 200 degrees). Don’t boil.
Why: Potatoes are dense. Boiling them will cook the outside faster than the inside, resulting in a mushy exterior by the time the interior is cooked. The lower heat of the simmer will cook the large potatoes more evenly, much like the lower heat of the oven cooks the chicken more evenly.
Once you can stick a fork or toothpick into the center of the potatoes without resistance, they’re done. Drain and either mash or rice potatoes into the same hot pot as you simmered them in, adding butter and milk/cream as needed to reach the consistency you like.
Serve: mound the mashed potatoes on a plate and push down on the center to create a crater. Slice the rested chicken breasts into three pieces at an angle. Place desired number of pieces of chicken in the cratered potatoes and top with the sauce.
Enjoy!
A few random notes:
You can do the same sear-roast method with an herbed pork loin, only roll the loin in the herbs after searing (before roasting) to avoid burning off the herbs.
You can simply roast a whole chicken without pan searing but getting the same effect by first roasting the whole bird on high (425) until fully browned (about 30 minutes) then turning down to low (325) until internal temp reaches 165 (about an hour).
I haven’t tried this yet, but you can even try roasting either chicken or pork in the oven by starting it at 500 degrees until browned, and then simply turning off the oven and leaving the meat inside until the oven is cooled. Whole thing should take about 90 minutes and result is a perfectly cooked/rested dish.
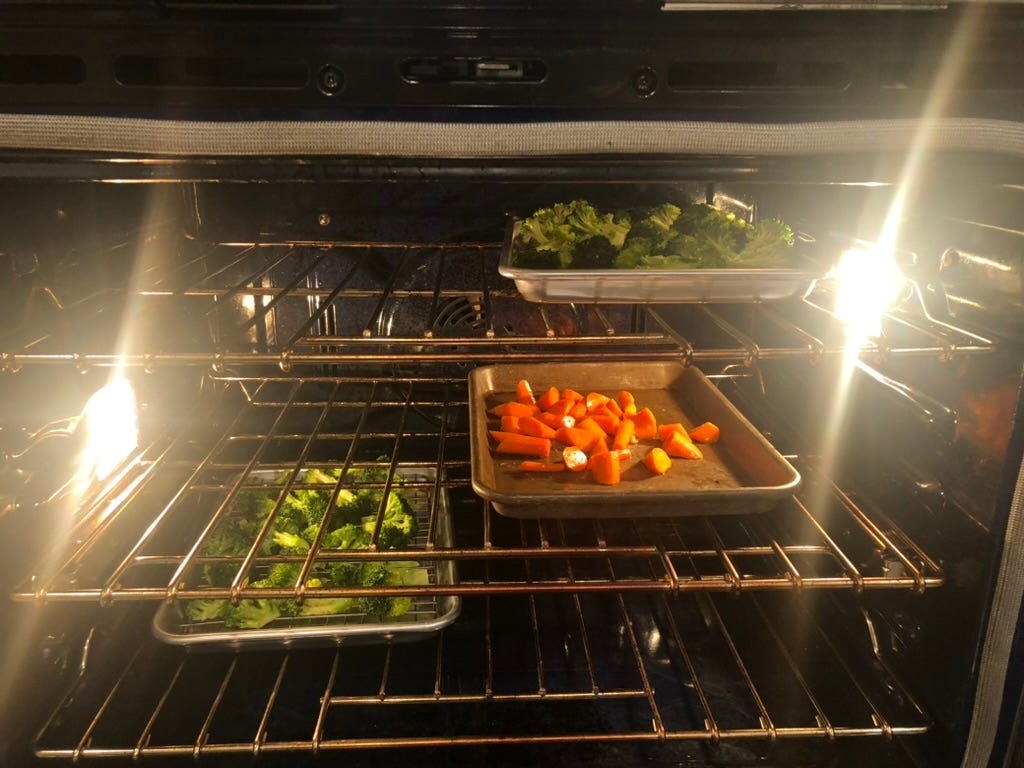
Finally, take the time to test out where the hot and cold spots are in your oven (like the photo at the top of this post). Place sheet pans of vegetables in different spots (lower/middle/top racks, right to left) and roast them at the same temp for the same time. Do any brown more or faster? Slower? Do the same for your grill. Adjust accordingly.
Very well written. Thanks for helping me better understand how to cook meat.