

Pastry
How cooking outside our comfort zone can result in new awareness, amazement, and joy.

I made a freaking croissant!
By that I don’t mean “I” made a croissant. I mean I Made a croissant. I made a CROISSANT.
That’s not something I’d ever thought I’d be able to say.
Pastry is totally new for me. Sure I’ve worked with dough in making pasta, bread, pizza. But pastry is a different beast. Seeing pastries in the bakery window is like peeking into a different world. Those who make pastries seem like practitioners of the Dark Arts, with magical secrets and lore reserved for a different kind of cook.
But over the course of the program so far we’ve dabbled in the pastry in and out, with which I’ve had varying degrees of success. Pie crust and pastry cream… pretty easy actually. Mousse… not so much.
But this week took it to another level and created a lightning bolt of awareness and understanding. See, other lessons in the culinary program so far have been tweaking details on skills and techniques I already have and am familiar with… leveling up things I have experience with.
Croissants, on the other hand, is greenfield territory for me. Breaking new ground.
Now I love croissants. But the idea of actually making one myself never occurred to me as something that was possible. It just seemed like too big a lift. Too much science and technique that was beyond my skills or ability.
I imagine the way I viewed croissants was like how many view cooking in general — something too mysterious and unreachable to try. But just like any other kind of cooking, once you’re taught how to do it, it’s really not that hard.
I mean… it’s a little hard. As you’ll see below, it’s actually a lot of work. But the difficulty lies in knowing what to do, and taking the time to do it. In other words, it’s not at all intuitive and is very time intensive. But once you’re shown how to do it and you dedicate the time to make it happen, it’s a highly rewarding payoff.
So when I actually made a batch of croissants (with a lot of over-the-shoulder direction), pulled them out of the oven, and ate them without embarrassment… I was just amazed.
I haven’t had that feeling of “I made that'' in quite some time, at least not on this level. By the way, that’s not pride or boastfulness. It’s not showing off. It’s amazement. I was downright flabbergasted. I was expecting an abject disaster that would be good for a laugh.
But instead it was an awakening. Once you realize that this thing you’ve eaten many times can be created with your own hands, you see both the food and your ability a little differently. You suddenly see possibilities.
Your perspective changes. Knowing not only that it CAN be done, but HOW to do it. And that YOU can do it.
At my age and experience, that’s rare. It’s a return to childlike wonder… experiencing that flash of understanding that you see in kids’ eyes when they see or experience something new.
For me it was croissants. For you it might be toasting bread, or simply making anything at all after years of ordering Costco dinners (ahem: Lea). What the food is doesn’t matter. So long as it opens your eyes and mind to a new way of experiencing the world.
It’s something that once seen, can’t be unseen. It can’t be untasted. And for me, that’s addictive. That revelation of knowledge. Suddenly seeing the world in a slightly different way.
It can’t be turned off… only ignored. It demands to be fed. And feeding it is satisfying.
–
Croissants
Croissants belong to a category of pastry known as Laminated Dough, a reference to the process of folding butter into dough multiple times to create a series of thin, flakey layers of dough.
What’s interesting about this is the interplay between the dough and the butter. Throughout the process, these ingredients are actively working against each other, so managing it requires a strict adherence to a schedule of alternating activity and waiting.
It comes down to time and temperature.
Croissants use a yeasted dough, which when worked creates gluten. Gluten makes dough tight (eg: when you’re trying to roll out dough and it contracts, that’s the gluten working). Putting dough in the fridge allows the gluten to relax and makes it easier to work with.
But it also has butter. A LOT of butter. That butter can’t stay too long in the fridge or it becomes too hard to work, and risks poking through the layers of dough… essentially ripping, which is no bueno. The butter has to be soft enough to have some plasticity, but hard enough to not squish out when rolling.
So what you have is a series of short windows in which you work the dough, cool it in the fridge, work it again, cool it again, etc. And once you start, you have to finish or it’s all ruined.
On yeah, and it takes three days. Here’s the process (for insight only, not a series of directions to follow).
Day 1
Mix the dough (called the detrempe”), which is milk, sugar, yeast and flour.
Stuff it in a plastic ziplock bag
Let it rest overnight
Day 2
Prepare the butter (called the “beurrage) which is at minimum a half pound of butter pounded down to a quarter-inch thick rectangle. I mean you have to pound the shit out of this, as it can’t be at room temperature. It’s about 55 degrees.
Roll out the detrempe to a rectangle three times long as wide.
Lock the beurrage into the detrempe. The beurrage should cover ⅔ the length of the detrempe rectangle. Then fold the top third over bottom third like you’re folding a paper to fit into a letter envelope (it’s literally called a “letter fold”).
Roll out the folded detrempe/beurrage again to 3x long as wide, and letter fold again. The beurrage is now locked into the detrempe.
Put in fridge and let rest for 45 minutes to an hour.
Repeat this process three times (roll/fold/roll twice and put in fridge for the same period of time). When you take the locked dough from the fridge, the butter will be kinda hard. So you have to pound it out w/o letting the butter break the dough or tear against your board.
Wrap and let it rest overnight
Day 3
Roll out the dough (and with the pounding) to a ¼ - ½ inch thick in a roughly 12x18 rectangle and cut into triangles
Roll the wide end of the triangle to the pointy end ala a traditional croissant shape and let proof until they’re double their size.
Brush with an egg wash, and bake at 400 for about 30 minutes.
(Technically you can do all this in a day, or even two (convert the 24 hour rest to a 3 hour rest) but the croissants won’t be as good.)
Now as you can see, there’s a lot of work, time, and technique going into this. But this is what creates those flakey layers of dough you see in croissants. Between the various folds and rolls, you’re creating dozens of layers.
When those layers of butter and dough hit the oven, the cold butter steams and creates those thin layers of dough you get once the baking is done. (This is called “mechanical leavening” by the way, which is defined as a method of making dough rise through physically manipulating the ingredients to hold or release air.)
By the time I rolled my croissants, they were somewhat torn, and had weird butter bubbles erupting over what should be a nice smooth dough. They looked like pastry lepers.
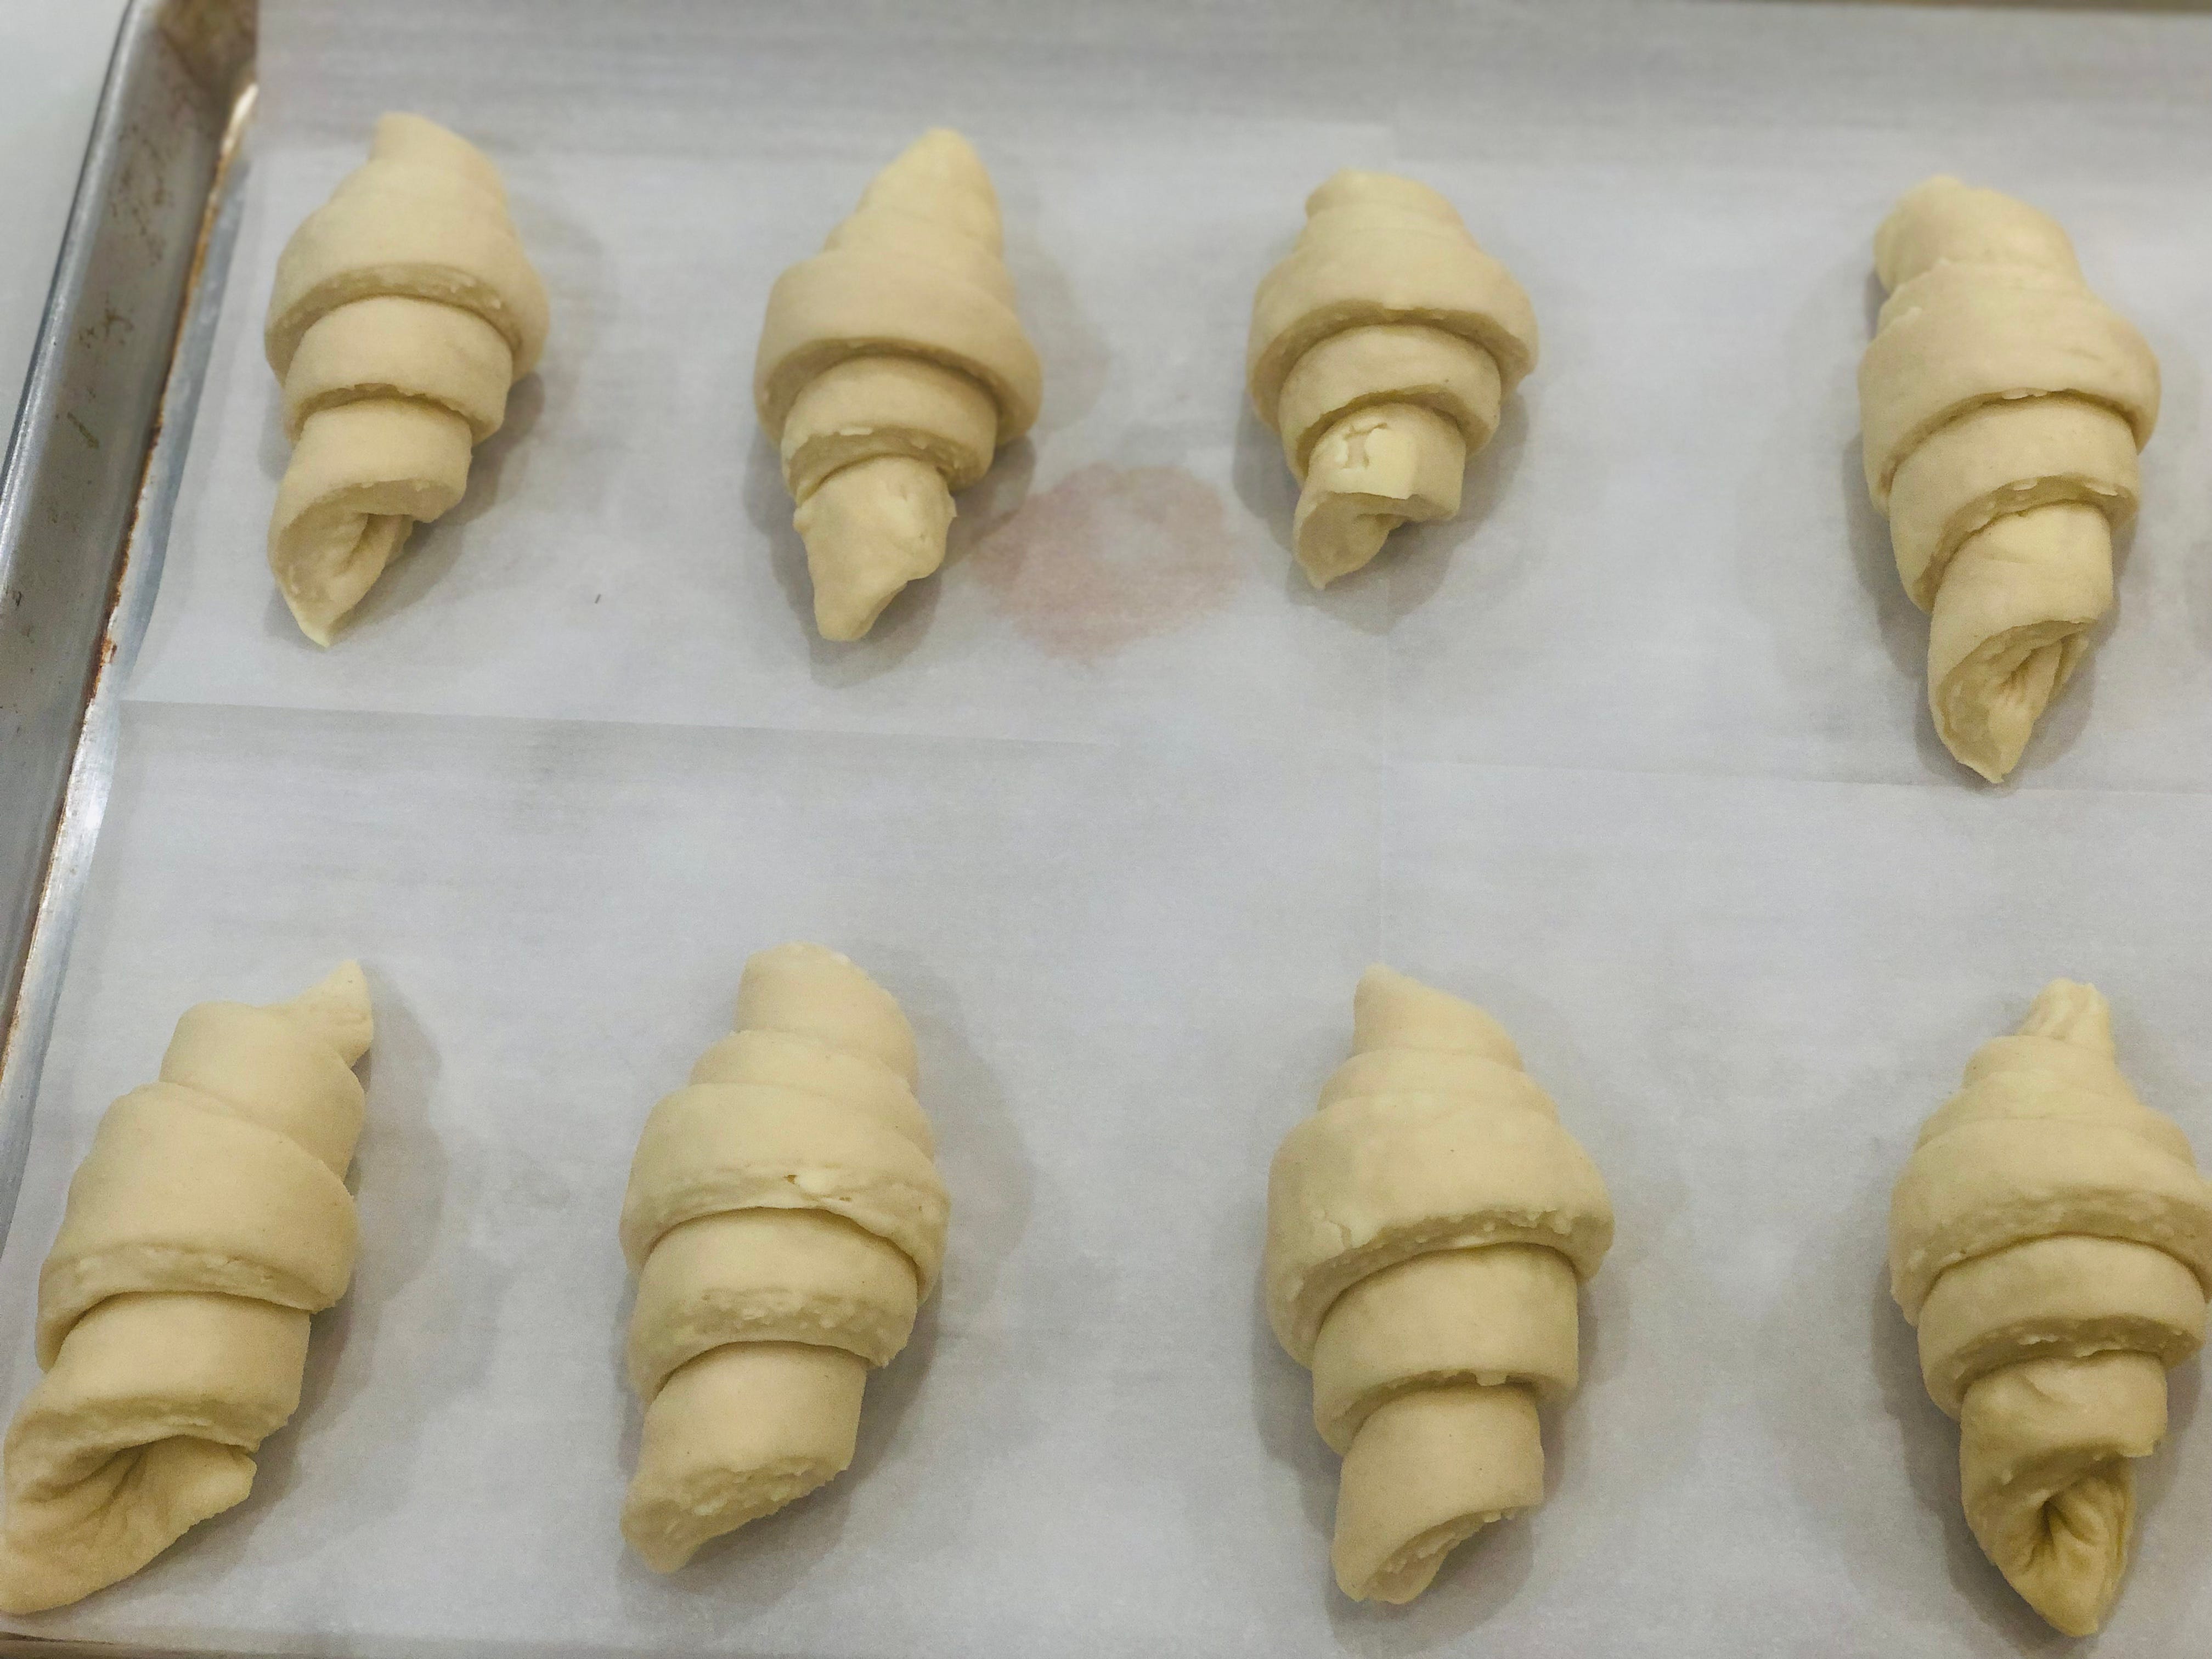
So my confidence level as they went into the fridge was pretty low. But here’s how they turned out.


As you can see… a nice, crispy flakey crust, all the expected layers inside, and they pulled apart when eating in highly satisfying, long strings of dough. I’m thoroughly hooked and will definitely make them again when I have the time.
But until then, I’m ruined for “average” croissants. Only by them at a proper bakery (no Kings Soopers or Costco “croissants” for you!). Look for a dark brown exterior like those pictured here… that’s the sign of a proper croissant.
And be extra sure to tip the baker now that you know how much work goes into these things.